Welcome to the R.E. Piland Online Shop Tour!

We often get inquiries about how our jewelry is made, so we thought it would be good for anyone who was interested to be able to follow the process from the comfort of their own home. The tour goes through all the steps of designing a piece, from inspiration to final polish.
Sketching & Design
The first stage of production is designing the piece and making the model. Rob is constantly sketching and revising designs. Some of these designs are destined to remain on the page, while others will be brought to life as beautiful, wearable art. When he is decided on a new pattern for production, he makes the model, which will be used to make the rubber mold of the piece. The more effort and time that goes into making the model, the better the result will be when production begins.
This initial process is where much of Rob's most artistic skill is employed, as he must visualize what the piece will look like and translate that to paper to confirm that the pattern will be what he wants. He must then put that drawing to metal, which gives the final impression of what the piece will look like. This is where Rob's work differs from that of most jewelers; his original models are made in metal, not wax, using age-old fabrication techniques. This provides the distinctive clean edges and sharp relief that characterize R.E. Piland pieces.
Making the First Model

When the design is finished, Rob must assemble the first model from scratch. This model must be exactly how the finished piece will look, as it will be used to make the rubber mold. A great deal of hand work can go into making the model. As mentioned in the previous step, Rob's models are always made in metal, not wax, which lends the distinctive sharpness to his designs.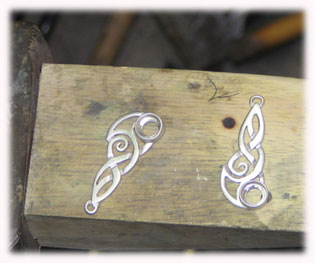
In relatively flat pieces such as these earrings, the first step is piercing out the shape of the piece from a sheet of silver. A paper pattern is glued down to act as a guide, and each opening is carefully cut out. Then a variety of hand and power tools are used to smooth rough edges, even curves and cut interlace, with checks at every stage for accuracy and consistent form - doubly so in cases like this where two pieces must have identical elements!
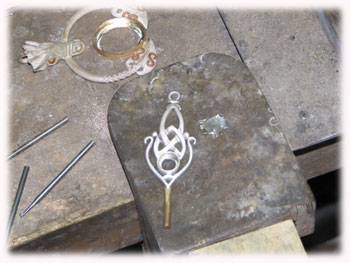
Finally, a rod called a sprue is soldered onto the model to prepare it for molding, we'll see why in the next step. Even here, careful consideration is a must, because where there is a sprue on the model, there will be one on the casting; it must be placed so that it will allow the piece to cast completely and still be easy to remove later on.
Making the Mold & Drawing Waxes
Once the model is finished, a rubber mold is made. The model is packed in a special type of rubber  inside an aluminum frame and put in a vulcanizer, which heats the rubber to allow it to melt and completely surround the model and then cures it. The solid block of rubber is then cut away from the model, a task that requires a lot of skill and patience, and the mold is ready.
The mold is used to make many wax models of the piece, which will be used for casting. The wax is injected into the negative mold, which forms a positive when the wax is removed from the rubber. Though the wax is injected by a machine, each wax must be inspected for flaws before going on to be assembled into a tree for casting.
 As casting is a labor and time-intensive process, setting up wax trees needs a steady hand to put as many pieces on a single tree as possible. The waxes are affixed to the tree with a small amount of melted wax and must be held securely so they do not separate from the tree during the next step, investing.
Investing & Dewaxing
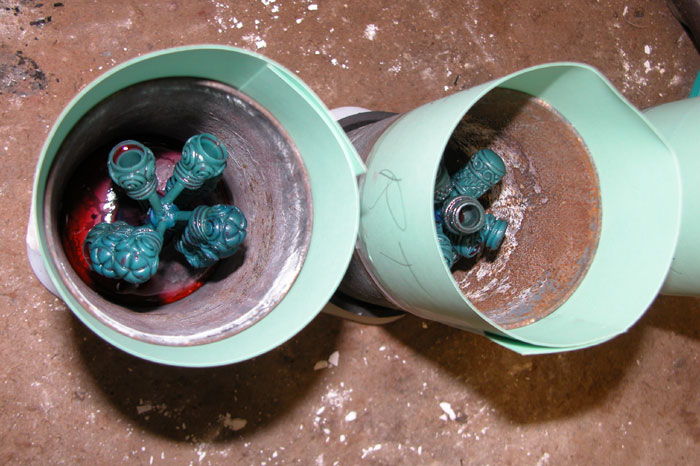
The assembled trees are put into steel flasks and are ready to invest. In this process, a quick-setting plaster is mixed and poured into the flasks, surrounding the wax. The wax trees have been dipped in a special lubricant which helps the plaster completely coat the models, reducing the amount of air that can be trapped in between wax and plaster, and thereby reducing the chances of a failed casting.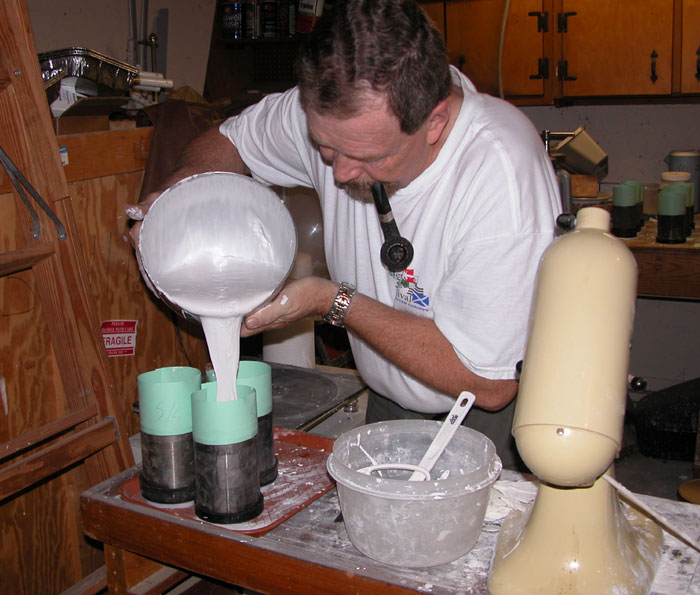
When the plaster is completely hardened, the flasks are put into a steam de-waxer. This causes the wax to melt out of the plaster, leaving behind negative space in the shape of the pieces, which in casting will be filled with the molten metal.
Dewaxing also helps to cure the plaster. It is important that the plaster molds be completely dewaxed. If any wax were to remain in the flask, it could interrupt the flow of metal and produce a bad casting. The next process, however, prevents this from happening.
Burnout & Casting
The next step is called burnout, and immediately precedes casting. After dewaxing, the 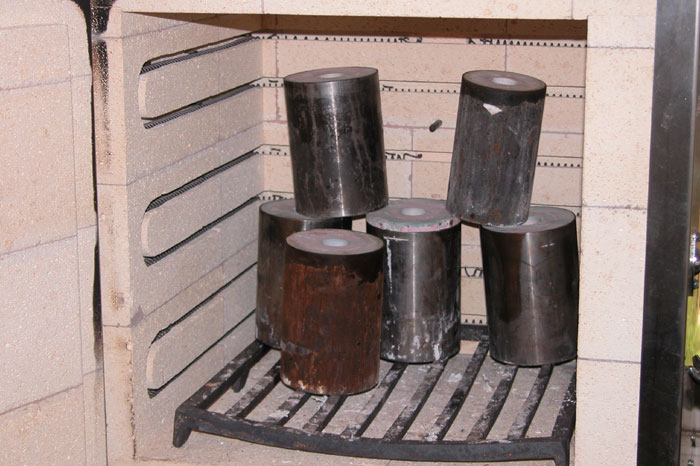 flasks are put into a burnout oven, and are heated to over 1400°F. This not only ensures that no wax remains in the plaster, but it prepares the flasks to receive the liquid metal. If the flask were cooler, the metal might cool before it reached the farthest cavities of the mold and the casting would be incomplete. By heating the plaster, the metal has a better chance of completely filling the flask and producing the full number of pieces.
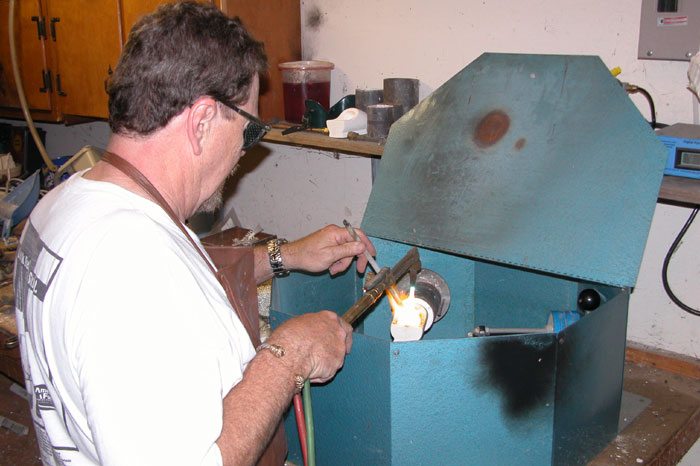
The flasks are removed from the oven with long tongs and placed in the centrifugal casting machine. Metal is melted in a ceramic crucible, which feeds directly into a hole in the flask. The carriage is then released and spins rapidly, flinging the liquid metal into the plaster, where it quickly hardens. The flask is removed and set aside to cool slightly while the next crucible is set up and the next flask loaded into the caster. It is then dipped in water to dissolve the hot plaster, allowing the metal to be removed.
Filing & Cleanup
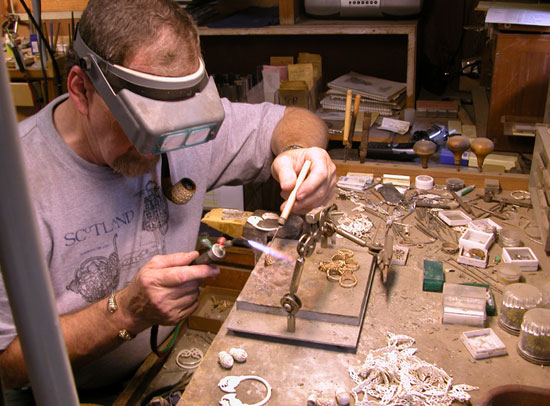
When the new castings come to the bench for cleanup, all work is done with hammers, files, saws and torches. The sprue, where the piece was attached to the tree, must be filed off. Any bubbles or other irregularities in the piece must be corrected if possible - if not, the piece is put in a scrap bin to be recast later. 
Rings are also sized at this time, as in the photo at right. Rotary tools are used to remove excess metal in the fine details of the piece, such as scrollwork and piercings. Finally, the piece is sanded with progressively finer grades of sandpaper. Apart from the design phase, cleaning up the raw castings requires the most technical skill and ingenuity, as it requires as much a machinist as a jeweler.
Polishing & Stonesetting
When the castings or 'blanks' have been filed, cleaned and sanded, they are ready for polishing. Polishing is frequently done by hand, particularly in the case of gold pieces, but is also done in small batches by tumblers which contain varying grades of abrasive shot. This practice is necessary because hand-finishing is time-consuming and Rob works largely by himself, and doing all polishing by hand would be prohibitively expensive. The tumblers speed production and keep Rob's prices down without sacrificing the handmade nature of the jewelry.
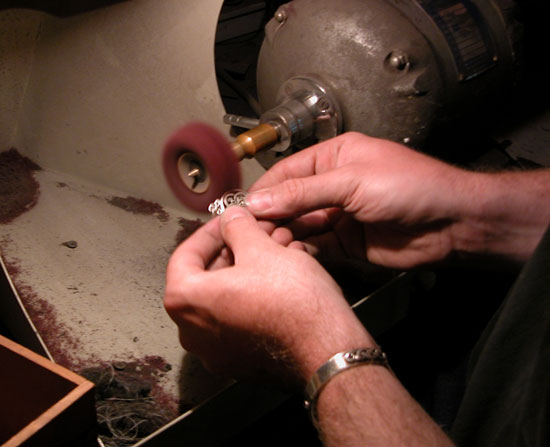
Pieces are tumbled for several hours in the first tumbler to put the first level of polish on the metal. At this point silver items are placed in an oxidizing solution which blackens the metal. When the final polish is put on, recessed areas of the jewelry will remain black, heightening the contrast of the piece. After oxidizing, the jewelry is put into the second tumbler, where it is brought to the second stage of polishing or 'satin finish.' A satining wheel is used on hand-finished items, as in the photo at the right. Any pieces which require gemstones now receive them.
To set stones, the bezel is cleaned out with a rotary bit, and the stones are selected from Rob's wide inventory. The stones are seated in the bezel, which is then crimped and smoothed by hand with a special set of tools to hold the stone securely in place. This requires great hand and arm strength, and more often than not a lot of patience!
Once the stones are set, all silver jewelry goes to one more tumbler for a final polish. The final polish on gold jewelry is always done by hand.
Packing & Shipping
 When the pieces have been brought to the final polish, they are removed and scrubbed with soapy water to remove any residue, and then sorted and dried. The jewelry now goes through a final inspection for proper stonesetting, consistent polish and correct sizing.
When dry and inspected, jewelry is taken to the office where it is either put into stock, ready for the next order or show, or immediately packaged and shipped out to fill existing orders. Office manager Liz Piland oversees the care of the jewelry from this point, maintaining inventory and tracking orders for R.E. Piland's many customers.
